Water Lilies Acrylic Painting – Common Mistakes – Tech Deco
Updated: December 19, 2024
61
Water lilies acrylic painting are beautiful flowers that float on top of ponds and lakes. They come in many colors, like white, pink, and purple, and are often seen in famous paintings. One of the best ways to paint water lilies is using acrylic paint. Acrylic paint is special because it dries quickly and is easy to work with.
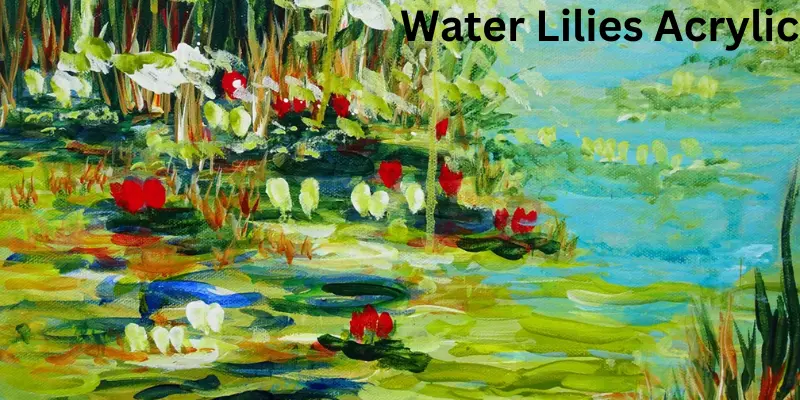
If you’ve ever seen a painting of water lilies, you might notice how soft and pretty the flowers look, with their smooth petals and bright green lily pads. In this article, we’ll learn how to paint these lovely flowers in acrylic. Whether you’re a beginner or already enjoy painting, you’ll find that painting water lilies with acrylics is a fun and exciting way to make your artwork come to life.
Why Choose Water Lilies for Acrylic Painting?
Water lilies are beautiful flowers that float on water, and they make a perfect subject for painting! They have soft, smooth petals and bright colors that look amazing in any artwork. Acrylic paints are great for painting water lilies because they are easy to use, dry quickly, and give your painting a nice, smooth finish.
When you paint water lilies with acrylics, you can use bright colors to show off the flowers’ beauty, and you can mix the paints to create different shades of green for the leaves and blue for the water. The best part is that acrylic paints are not as messy as other paints, so you can enjoy painting without worrying about spills or stains!
If you love nature and want to create a beautiful, colorful painting, water lilies in acrylic are a fun and exciting choice. Plus, acrylic paints are perfect for beginners because they let you fix mistakes easily if something doesn’t turn out the way you want it.
Step-by-Step Guide: How to Paint Water Lilies in Acrylic
- Step 1: Gather Your Materials Before you start, make sure you have everything you need:
- Acrylic paints (green, pink, white, yellow, blue, and purple)
- Paintbrushes (a big one for the background, and a smaller one for details)
- Canvas or a piece of thick paper
- A cup of water (for cleaning brushes)
- Paper towels (to dry your brushes)
- Step 2: Paint the Background Start by painting the background of your painting. You can use soft colors like light blue or green for the water. Grab a big brush and gently paint the whole canvas, leaving some space for the water lilies.
- Step 3: Add Lily Pads Next, let’s paint the lily pads! For this, use a round brush and mix some green paint. Then, paint big oval shapes on the water. You can add a few smaller lily pads around the bigger ones, just like how they float on water. If you want your lily pads to look more real, add a little yellow or brown to the green paint.
- Step 4: Paint the Water Lilies Now, it’s time to paint the beautiful water lilies! Water lilies can be different colors, but we’re going to use pink or white to keep it simple. Use a small brush and start painting petals around the center. The petals are round and spread out from the middle. Don’t worry if your petals don’t look perfect nature is not perfect either!
- Step 5: Add More Details Once your water lilies look good, you can add some small details to make them pop. Use a tiny brush to add little strokes of white or yellow in the center of the flowers to show the pistils (the middle part of the flower). You can also paint some tiny lines on the lily pads to show the texture.
- Step 6: Add Shadows and Highlights To make the lilies and lily pads look 3D, you can add some shadows and highlights. For shadows, use a little bit of dark green or purple paint on the bottom side of the lily pads. For highlights, use some white or light yellow paint on the top side of the lily pads and the petals of the lilies. This will make them look like they are catching the sunlight.
- Step 7: Final Touches Look over your painting to see if anything needs a little more color or detail. If you feel like your water lilies need to stand out more, you can carefully add another layer of pink or white to the petals. Once everything looks good, let your painting dry.
Now you know how to paint a beautiful water lily acrylic painting! Don’t forget to clean your brushes when you are done, and enjoy showing off your artwork.
Water Lilies in Different Art Forms: A Comparison
Water lilies are beautiful flowers that artists love to paint. You can see them in different types of art like acrylic, watercolor, and oil painting. Each art form makes the water lilies look a little different, and each one has its own fun way to paint them.
1. Water Lily Acrylic Painting
- Acrylic paint is thick, fast-drying, and easy to use. When you paint water lilies with acrylics, you can make bright and bold colors. It’s great for showing the petals of the water lily and the leaves floating on the water. Acrylic paint dries quickly, so you don’t have to wait long before you can add more layers and details. Artists who use acrylics for water lilies often get a smooth, shiny look on the canvas.
2. Water Lily Watercolor Painting
- Watercolor paints are very different. They are more like watery colors, and when you use them, the paint can spread and blend in soft ways. When painting water lilies with watercolors, you can create gentle colors that mix together beautifully. Watercolor gives a light, dreamy effect, making the water lilies look soft and delicate. This type of painting might take a little longer because you have to wait for each layer to dry, but the results can be very pretty and peaceful-looking.
3. Water Lily Oil Painting
- Oil paint is another way to paint water lilies. Oil paints are thick and take a long time to dry. This gives artists more time to mix and blend colors together. Oil painting lets you create rich, deep colors. When you paint water lilies with oil paint, you can add lots of texture and detail. The water lilies might look shiny and realistic because the paint stays wet for a long time, so you can work on it in layers. Oil paintings of water lilies often look very smooth and have a shiny finish.
You choose to paint water lilies with acrylics, watercolors, or oils, each method gives you a different way to show the beauty of these flowers. Acrylics are bright and fast, watercolors are soft and dreamy, and oils are rich and detailed. Each art form has its own magic, and it’s up to you to pick which one you like the most.
Tips for Creating Realistic Water Lily Drawings and Paintings
If you want to make your water lily drawings and paintings look super realistic, here are some fun tips to help you out! Don’t worry, you’ll be a pro in no time!
1. Start with Light Sketches
- Begin by lightly sketching the basic shape of the water lily and the lily pad. Don’t press too hard on your pencil just make soft lines. This way, you can easily fix things if you make a mistake.
2. Focus on the Details
- Water lilies have a lot of little details that make them look real. Look closely at the flowers and see how the petals overlap each other. You can draw these small details carefully to make your lily look more lifelike.
3. Use Different Shades of Green for the Lily Pads
- Lily pads come in different shades of green. When painting them, use light and dark greens to give them depth. This will make them look more 3D and real, instead of flat.
4. Add Light and Shadow
- Just like in real life, water lilies and lily pads have light spots and shadow spots. To make your painting more realistic, think about where the light comes from. Shade the parts of the lily and lily pad that are away from the light, and leave the parts that face the light bright.
5. Mixing Acrylic Paints
- If you are using acrylic paints, mix your colors well to get the perfect shades. Water lilies often have soft pinks, whites, and even purples. Don’t forget to add a little bit of white to your colors to make them look lighter and more like real flowers.
6. Smooth Brush Strokes for Petals
- Water lily petals are smooth and soft. When painting the petals, use light, smooth brush strokes. Don’t press too hard on the brush; let it glide over the canvas. This will help the petals look soft and delicate, just like real water lilies.
7. Add Reflections in the Water
- Water lilies float on the water, so there will be a reflection of the flowers and leaves in the water. You can paint a soft reflection underneath your water lily. Use a little bit of white and light blue to show the water’s reflection, but don’t make it too sharp make it look soft and smooth.
8. Practice Makes Perfect
- Remember, it’s okay if your first try does not look exactly like you want. Keep practicing! The more you paint, the better you’ll get at making your water lilies look realistic.
Famous Paintings of Water Lilies
Water lilies are beautiful flowers that artists love to paint, and some of the most famous paintings in the world show these lovely flowers. One artist who is especially famous for painting water lilies is Claude Monet. He painted many pictures of water lilies in his garden, and his paintings are some of the most well-known in the art world.
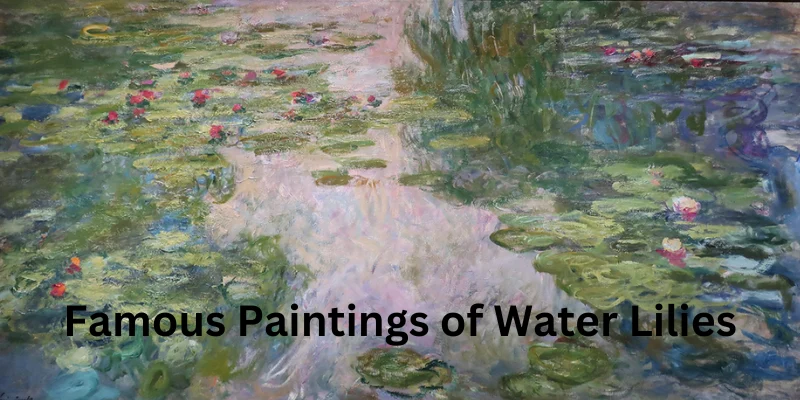
Monet’s water lily paintings are famous for their peaceful and colorful scenes. He painted the flowers floating on a pond, with reflections of the sky and trees around them. These paintings are called “Water Lilies”, and they were created in different colors like pink, white, purple, and blue. Monet’s paintings help people imagine the calm feeling of being near a pond full of water lilies.
There are many paintings by Monet that show different parts of his water lily pond. Some of his works show just the flowers, while others show the reflections of the trees and sky on the water. These paintings are special because they don’t show things in the usual way, but instead focus on light and color.
Monet’s work was so famous that many art galleries around the world have displayed his water lily paintings. Some of the most famous ones are displayed in the Musée de l’Orangerie in Paris, France, where visitors can see them up close.
Besides Monet, other artists have also painted beautiful water lilies. Some painters like to focus on the flowers themselves, while others show the whole pond with lily pads floating on the surface. But no matter how the artists paint them, water lilies always look stunning.
Choosing the Right Materials for Water Lily Paintings
When you’re ready to paint your water lily masterpiece, it’s important to have the right materials. Don’t worry, it’s not too hard to get everything you need! Here’s what you’ll need to make your water lilies look amazing:
1. Acrylic Paints
- Acrylic paints are perfect for water lily paintings because they dry quickly and can be mixed easily. You’ll want to get a basic set of acrylic paints in different colors, like white, pink, purple, blue, green, and yellow. These colors will help you paint the beautiful petals and lily pads.
- Pro Tip: Make sure to get high-quality acrylic paints to make your artwork pop! You can find these at art supply stores or online.
2. Brushes
Brushes are really important for painting the details of your water lilies. Here’s what you’ll need:
- Flat Brushes: These are great for painting the big parts, like the lily pads.
- Round Brushes: These are perfect for painting the smaller, detailed parts, like the petals and stems of the water lilies.
- Small Detail Brushes: These brushes will help you add the tiny details, like the veins in the leaves.
- Tip: If you are just starting, a set of basic brushes will be enough!
3. Canvas or Acrylic Paper
- To paint your water lilies, you need something to paint on. You can use canvas or acrylic paper. Canvas is the most common option because it’s strong and holds the paint well. If you’re using canvas, make sure it’s stretched on a frame, so it’s easier to paint.
- Tip: You can also use a canvas board, which is a thinner option and easier to work with.
4. Palette
- A palette is where you’ll mix your paints. You can use a plastic, wooden, or even a paper palette. When you mix your colors, you can create the perfect shades for your water lilies. Don’t forget to have a water cup nearby to clean your brushes.
5. Water and Rags
- Always have water and some rags or paper towels close by. You’ll need the water to clean your brushes and keep your paints moist. The rags or paper towels are great for wiping off extra paint or cleaning up any spills.
6. Optional: Acrylic Mediums
- If you want your paints to behave differently, you can try acrylic mediums. These are special products that can make your paint thicker, glossier, or even more transparent. You don’t need these right away, but they can help you add extra effects to your painting once you’re more comfortable.
Other Popular Water Lily Paintings and Designs
Water lilies are really cool flowers, and they show up in many different styles of art. Artists love to paint them in all kinds of ways, using different colors, backgrounds, and techniques. Here are some other popular ways water lilies are painted:
1. Lily Pad Paintings
- Water lilies usually grow on lily pads, so they often show up together in paintings. A lily pad painting might show a big green pad with a pretty pink or white water lily on top. The leaves are round and float on the water, and they help make the flowers look even more beautiful.
2. Paintings of White Lilies
Some artists like to paint white lilies because they are calm and peaceful. White lilies are often seen in gardens, and they stand out against green leaves. The simple white color makes them look elegant, and many artists paint them in soft shades to show how gentle and pure they are.
3. Lily Pad Flower Paintings
- This type of painting shows lily pad flowers growing on the water. The flowers can be different colors like pink, purple, or yellow, and they sit on the floating lily pads. These paintings usually show the peaceful atmosphere of the pond where the lilies grow. The colors of the water lilies and pads make the painting look calm and relaxing.
4. Lily Painting
- A lily painting can focus on just the flower itself. Some artists like to paint a close-up of the water lily, showing off its delicate petals. These paintings often highlight the different colors in the petals, like shades of pink, purple, or even blue. It’s a fun way to look at the lily in detail!
Water lily paintings can be simple or super detailed. Artists can paint them in many ways, making them look dreamy, realistic, or even abstract! Whether it’s the peaceful lily pad flower painting or the bright paintings of white lilies, there’s no wrong way to show off these beautiful flowers.
Common Mistakes to Avoid in Water Lily Acrylic Painting
When you are painting water lilies with acrylic paints, it’s normal to make a few mistakes. But don’t worry, because learning from them can help you improve! Here are some common mistakes to watch out for:
1. Not Mixing the Paints Well
- Sometimes, you might not mix your acrylic paints properly, which can lead to strange colors or streaks in your painting. Always make sure to mix your paints carefully so they look smooth and even. If you’re painting water lilies, mixing the colors just right will help your flowers look realistic.
2. Using Too Much Water
- Acrylic paint is thick and creamy, but if you add too much water, it can make the paint too runny. This could cause your water lilies to look blurry instead of sharp. Try using just a little water to thin your paint, but keep it thick enough so you can see all the details.
3. Rushing the Layers
- It’s easy to get excited and want to finish quickly, but remember, acrylic paint needs time to dry between layers. If you don’t wait for one layer to dry before adding the next, your colors might mix in a messy way. Give your paint some time to dry, and you’ll see your water lilies turn out much better.
4. Not Adding Enough Details
- Water lilies are beautiful because of all the tiny details, like the soft petals and the reflection on the water. Don’t be afraid to add details with a smaller brush! It’s these little touches that make your painting of water lilies look realistic and beautiful.
5. Not Using Enough Contrast
- Sometimes, people forget to use light and dark colors in their painting. Water lilies look amazing when you show the difference between the light parts of the flower and the dark parts. Adding shadows and highlights helps make your painting look 3D, just like a real water lily!
6. Forgetting the Background
- A lot of the focus goes on the water lily itself, but don’t forget about the background! A good background will make your water lily stand out. You can paint the water and lily pads to show the whole scene. Remember, water lilies grow in ponds, so make sure your background looks like water!
7. Overloading the Brush
- Sometimes, if you put too much paint on your brush, it can make your strokes look messy. Use a little bit of paint at a time, and keep your brush light and clean. This way, you’ll have more control over your painting and can make your water lilies look neat and pretty.
By avoiding these mistakes, your water lily acrylic painting will turn out much better! Take your time, enjoy the process, and don’t be afraid to try again if things don’t look perfect right away. Happy painting.
FAQs about Water Lilies Acrylic Painting
What is water lily acrylic painting?
- Water lily acrylic painting is when artists use acrylic paints to create pictures of water lilies. Acrylic paint is special because it dries fast and is easy to use, making it a great choice for painting flowers like water lilies.
How do I start painting a water lily in acrylic?
- To start, you’ll need some acrylic paints, a brush, and a canvas. First, paint the background with soft colors like blue or green. Then, use bright colors to paint the petals of the water lily and add details like leaves and lily pads. Just take your time and have fun.
Can I paint water lilies with watercolor instead of acrylic?
- Yes, you can! Watercolor painting is another way to paint water lilies, but it’s a little different. Watercolors are more see-through and flow easily, while acrylics are thicker and can be layered. You can try both and see which one you like best!
What are the best colors to use for painting water lilies?
- Water lilies come in many colors, like pink, white, and yellow. For a beautiful water lily acrylic painting, you can use soft pinks, whites, or even purples for the flowers, and bright greens or blues for the leaves and water.
How can I make my water lily painting look realistic?
- To make your water lily painting look more real, you can focus on the details! Add shadows to the petals and leaves, paint the water carefully to make it look shiny, and try blending colors smoothly to make everything look natural.
What’s the easiest way to paint a water lily?
- The easiest way is to start simple! Draw the shape of the water lily first, then add some color to the petals. Don’t worry if it’s not perfect. Just keep practicing, and you’ll get better at it.
How long does it take for an acrylic water lily painting to dry?
- Acrylic paints dry pretty quickly, usually in about 15-30 minutes, depending on how thick the paint is. So, you won’t have to wait too long before you can add more layers or finish your painting.
Can I paint a water lily on a different surface besides canvas?
- Yes! You can paint water lilies on paper, wood, or even rocks. Just make sure the surface is smooth and clean before you start painting.
What should I do if my water lily painting looks too messy?
- If your painting looks messy, don’t worry! You can always fix it. You can wait for the paint to dry and then paint over the parts you don’t like. Or, if you make a mistake, just add more details to cover it up and make it look even better!
Why are water lilies a good subject for painting?
- Water lilies are beautiful, calm flowers that float on water. They come in lots of colors and have soft, smooth petals, making them fun and relaxing to paint. Plus, they look amazing when finished!
Conclusion
Painting water lilies with acrylics can be super fun and rewarding! It’s a beautiful way to express your creativity and capture the calm and peaceful look of these amazing flowers. Remember, practice makes perfect, so don’t worry if your first painting isn’t exactly how you imagined it. You can always try again and improve with each brushstroke.
By following the steps we talked about, like using the right colors, brushes, and techniques, you’ll be able to create your own stunning water lily artwork. Whether you are painting a water lily design or trying to make a realistic water lily drawing, just keep practicing and having fun with it.
Please Write Your Comments